F1D Indoor Free Flight, the Journey!
While researching free flight models and topics for our growing website, we came across a documentary video on the competitive world of F1D Indoor Free Flight and it stoked an internal desire which must be pursued. The entire purpose of our small site is to gather information on our flying hobby and share it. We enjoy flying everything imaginable in this hobby and love the opportunity to discover something new. The ultra light indoor flyer known as an F1D model was just such a discovery. With this new desire to learn, we’ll take a methodical approach in our education of this world and will document the journey here in this blog post.
First, however, let us introduce you to the documentary video trailer that got us excited. Here it is:
The F1D Indoor Free Flight Journey has begun: (October, 2018)
It would be naive to think we could begin our journey at the end, and what would be the fun in that honestly? Our hobby is flying and building powered and non-powered models and stunt / single line kites, it is not our job. Flying small rubber band powered models has been a favorite past time as well and has been part of teaching kids and youth for years, so it is nothing new. Yet, the concept of designing, building and then successfully flying a rubber-band powered model, weighing less than a paperclip, is a bit intimidating to say the least. Good thing its a passion and not a means to an end!
With this understood, the plan will be to follow a simple three phase approach. In Phase 1, we will set out to understand the indoor free flight flying concepts. Phase 2, we will build a few different models from kits to understand this area and then finally, in Phase 3 we will design and build an F1D model. In each of the phases mentioned, we of course will do a lot of flying! The research, the building and the flying will all be appropriately documented and shared. Watch for dates in each phase as there will be parallel activity occurring at times. Follow along with us.
Phase 1
F1D Indoor Free Flight Flying…
In the Beginning
(Oct 21, 2018)
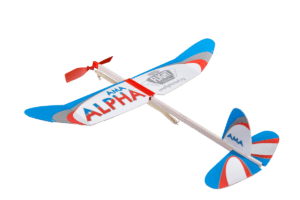
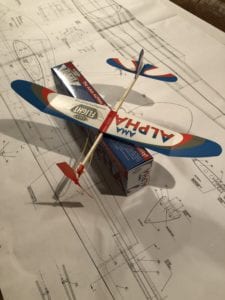
In our research, we settled on this AMA page and decided to order the Alpha kit. It is designed to aid in early flight lessons without the delicate nature of breaking the model.
Once we receive this kit, we will assemble it and do some initial flight tests. Good flight notes will be kept along with pictures and videos documenting the efforts.
(Oct 27th, 2018)
Our AMA Alpha has arrived and is assembled. Initial flight tests show it is very balanced and stable in straight flight. Will be taking it to a larger indoor facility early next week to begin to dial in the circular flying characteristics. Trim adjustments, rubber motor turns, etc will be documented. Having your model fly in a free flight circle is new to us, so getting a solid understanding of this process will be important.
(Nov 17, 2018)
Decided to wait to fly several Indoor Flyers at once, including the Alpha. Once the builds are completed, all will be flown together.
Stay tuned for more…
Phase 2
F1D Indoor Free Flight Flying…
Researching and building a few kits
(Oct 21, 2018)
While we await receipt of our Alpha flyer, we have been researching next step builds. Our research has been focused on Indoor Free Flight models specifically without the emphasis on F1D. This research led us to this site, where we settled on the Camp Robber kit and ordered it. Since we are not in a hurry to receive it, the 3 week lead time was of no concern. Hopefully, by the time we receive the kit, we will have significant data and experiments under our belt with the AMA Alpha kit.
(Oct 27th, 2018)
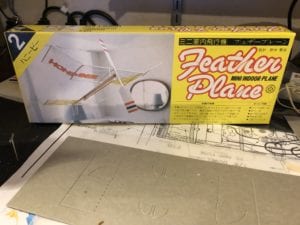
As we await receipt of the Camp Robber kit, we came across a kit out of Japan. It is a microfilm based kit with the propeller fabricated out of kent paper. Years of building balsa kits, but 0 experience with this new microfilm. So, we’ve decided to build one with zero expectations of being successful, all in parallel to activity with the AMA Alpha. We purchased two of these kits to give us some “extra” parts to learn with.
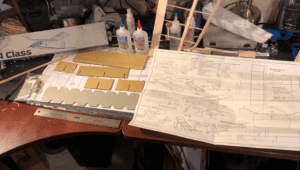
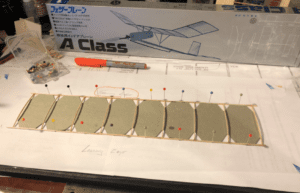
Here are the contents of the A-Class Kit, spread-out temporarily on the bench we are building the Great Planes Spectra. We’ll either clear out space or change benches.
(Oct 28th, 2018)
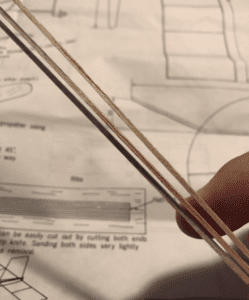
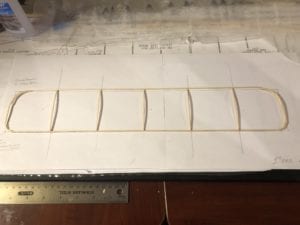
Smallest Leading and Trailing Edge ever assembled (by us). Take a look at this picture, these tiny balsa sticks represent the size of the leading and trailing edge of the main wing.
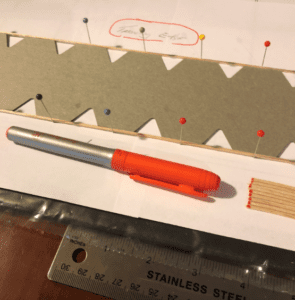
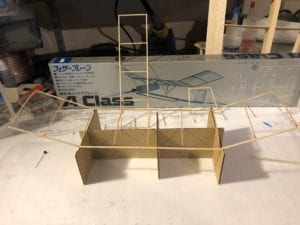
Here is the main wing jig secured to the building board. Also shown are the main wing ribs trailing edge, all marked with an orange marker. The shape is hard to see so they were marked to aide in assembly.
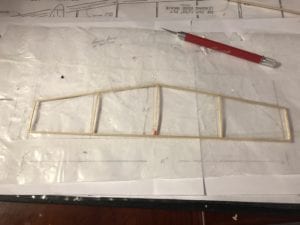
Here is the final assembly of the main wing, with ribs in place and glued. Gluing balsa this small is interesting to say the least. One drop of CA is a lot!!
(Oct 29th 2018)
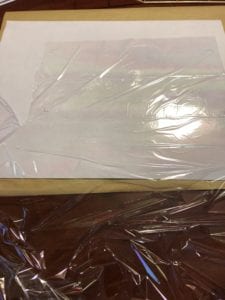
We are glad we purchased two kits! The clear film that we use to protect our plans from CA somehow, stuck to these small parts after gluing. Not sure why. We have had to scrap the first wing and redo it, this time with old fashioned wax paper. We lost a day, but transitioned more knowledge into wisdom!
On a side note: we just an email stating our Camp Robber kits are on their way. Very nice!
(Oct 31st 2018)
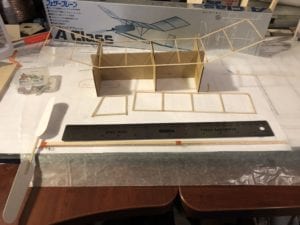
Assembly of the flying surfaces is complete. The framed wing, stabilizer and vertical fin are ready for a ‘very’ light sanding before covering. Sanding will occur on all parts prior to covering. The below picture shows the 3 assemblies ready for sanding.
The next step in the build is to work on the fuselage and propeller section. Interesting note here is the balancing efforts will take place on a fuselage, stabilizer / fin and propeller assembly without the wing. This is different than a traditional RC model where you balance it with the wings on, at the CG shown (or at the max height of the airfoil).
(Nov 12th 2018)
After a small vacation away from shop, back to building. Fuselage is finished. Time to cut material for prop and prop hub. Photo of completed fuselage with bearing and propeller to follow.
(Nov 17th 2018)
Have discovered the challenges of working with this microfilm covering! This stuff is crazy thin, moves with every breath and sticks to everything via static electricity and not to the model! Its a challenge, but giving up is not an option!
Here are a few pictures of the rudder, stabilizer and wing partially covered. In full disclosure, the wing covering moved several times after glue was applied to the balsa wood and you can see everything! No worries, this is attempt #1 and it will fly….someday….ugly or not!
(Nov 21st 2018)
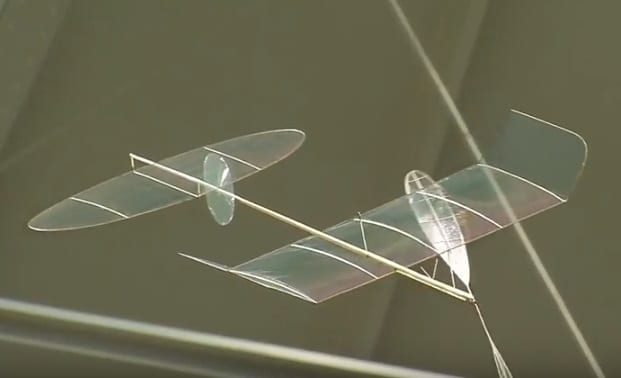
The first Microfilm based model for If It Can Fly is done. After sloppily finishing the wing, we assembled the stabilizer and rudder to the fuselage, set the Center of Gravity (CG) and then added the main wing. Here are a few pictures:
This model weighs 4.8g without rubber. Initial rubber weighs 0.83g.
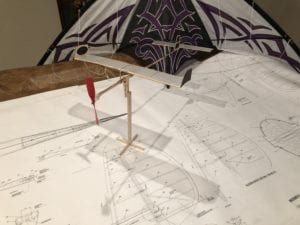
After assembly was complete, the next step was to learn how to wind up the rubber motor. The winder from the Alpha kit (mentioned above) was used. Its a bit difficult to wind with one person, so a jig will have to be developed. After a learning curve on winding, the A-Class Indoor Free Flight Flyer took flight! It flew slow and steady! A larger venue is required so video can be taken and that is coming next!
(Nov 22nd 2018)
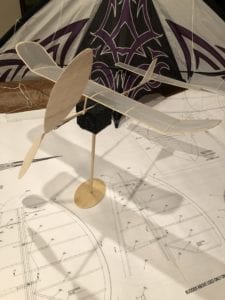
Built this even smaller indoor free flight model in one day, using the build lessons from the A-Class shown above. This one fly’s a tight 3M circle and will get some video as well, once we have all models built and ready to test.
The Camp Robber Build!
(Nov 23rd 2018)
This kit was extremely easy to build, highly recommend it!
Within a half day, the entire project was complete. The laser cut parts fit perfectly together and instructions were easy to follow. Here are a few pictures.
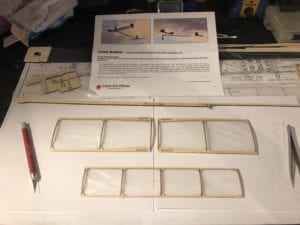
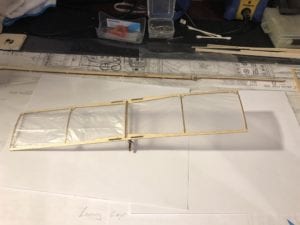
This model weighs 8.11g without rubber. Initial rubber weighs 2.1g
Next Up will be a self designed Indoor Free Flight Model, based loosely on all of the above. Once complete, all models will be taken to a gym, including the AMA Alpha, and test flown.
(Nov 27th 2018)
Prior to attempting to design / build an indoor free flight model which meets indoor flying requirements, the decision was made to scratch design and build for the sole-purpose of exploring both the design concepts and the build specifics. Doing this, without a constraint of a certain wingspan, chord and area of stabilizer would allow all the focus on the basics.
The I^2F^2 or I2F2 is the name given for this concept model. It simply stands for I squared and F squared, nothing fancy!
This model is bigger than any of the others built to date.
Here is a picture of it completed.
This model glides well but with the first pass of the prop, it is under powered. Will experiment with several different props to understand its characteristics. On the build front, the hands on experience has provided the tools and skillset to move forward confidentially. Next design and build will be focused on a first ‘spec’ model. It is getting interesting!
Phase 3
Designing and building a competitive flyer.
(Dec 1st 2018)
As with any research project, initial assumptions may prove to be unrealistic and it is certainly true in this case. Thinking an entry point into building a competitive type flyer in the Indoor Free Flight Class could start with F1D is a bit naive! After building several kits to understand material, technique, risks, etc it is obvious the plan to build a competitive flyer will require more time and effort. As it turns out, getting a flyer to hit weight goals for F1D require serious skill and the use of materials yet to be explored. The plan now is to focus on the F1L (EZB) Class of Indoor Free Flight flyers and design a model that meets those specifications and learn to maximize its flight time first. It has also become apparent that even this endeavor will take several iterations to learn the build techniques to hit the weight targets. So, here goes nothing!
F1L Requirements / Specifications:
- Minimum Weight without rubber motor: 1.2g
- Maximum Wingspan = 457.2mm (18″)
- Max Wing Chord = 76.2mm (3″)
- Stabilizer Area < 50% of Wing Area
- Build Materials: Wood and Covering (no microfilm).
(Note: need to understand “no microfilm” a better prior to covering)
I2-EZB Revision 1.
Goal for revision 1 is to keep weight under 4.0g.
Wing
- Wingspan = 18″
- Chord = 3″
- Area = 54″ sq.
Weight of wing, not covered, as shown above = 0.5g
Stabilizer
- Span = 11″
- Max Chord = 2.5″
- Max Area = 27.5″ sq.
- Actual Area (after removing area not present) = 22″ sq.
Weight of Stabilizer, not covered, as shown above = 0.31g
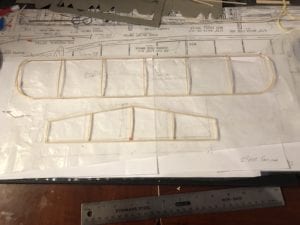
Weight of Wing & Stabilizer, not covered, as shown above = 0.81g
Vertical Fin
- Max Width= 2.75″
- Height = 2.5″
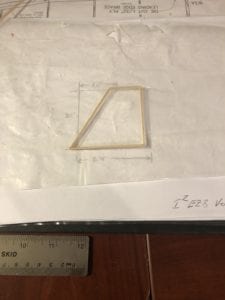
Weight of Vertical Fin, not covered, as shown above = 0.13g
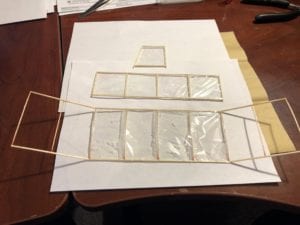
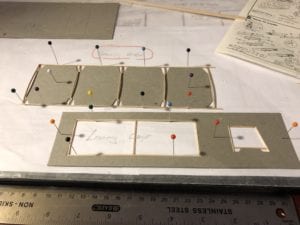
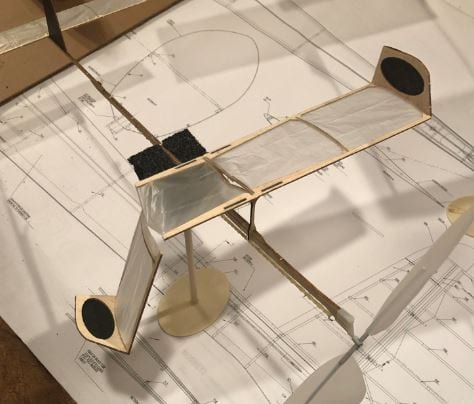
Here is an image of the wing, stabilizer and vertical fin, now covered. (note: wing still needs to be modified to shape dihedral into wing tips.
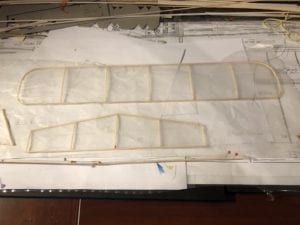
Covered Weights are:
- Wing = 0.79g
- Stab = 0.44g
- Fin = 0.15g
(Dec 4th 2018)
Finished the first prop assembly and did not take a picture. That was for the best actually, because after it was complete, the final model was assembled and test flown. The flaw in the design of the prop gave way on landing and this indoor free flight FIL design prop, broke in two places!
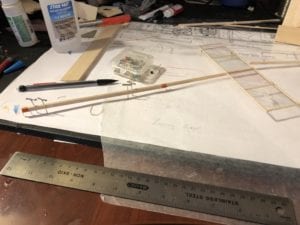
Redesigned the prop. It is coming in heavy at around 1.8g but that is ok for now. Better to get some decent flying characteristics with this revision 1 flyer, and then work to remove the weight. Here is the prop being assembled:
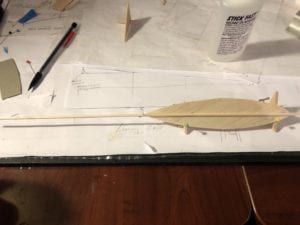
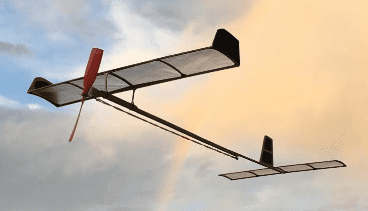
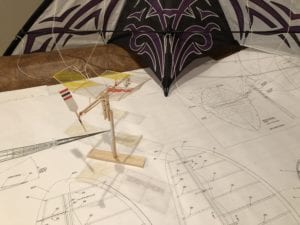
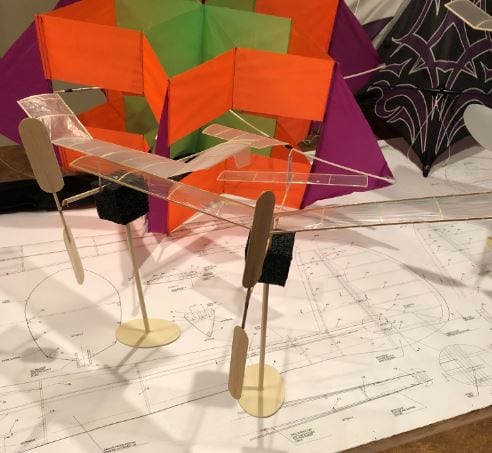
Here is the final revision 1 version of the I2-EZB. It is ready for flight testing followed by learning the techniques required to maximize rubber motor torque and more.
Final Weight @ 4.17g missed the target of 4.0g. All material was sourced locally at a hobbyshop. Next version will utilize thinner material in key areas, not available at the local hobby-shop, so it will be procured online. (not preferred…always want to support local shops when possible)
(Dec 11th 2018)
Have spent the last several days reading and studying alot of the other details needed to improve the odds of success in first flights. Topics include how to prep the rubber bands and how to wind them. Ideas on how to carry the models to the a site, and several long articles on understanding torque when winding. Clearly, building these flyers is just the beginning!
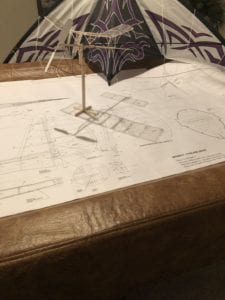
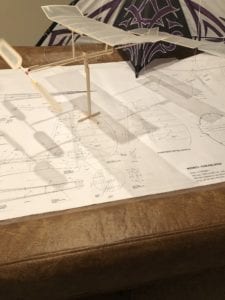
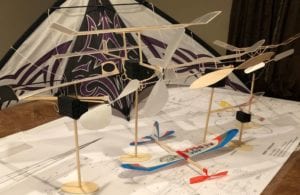
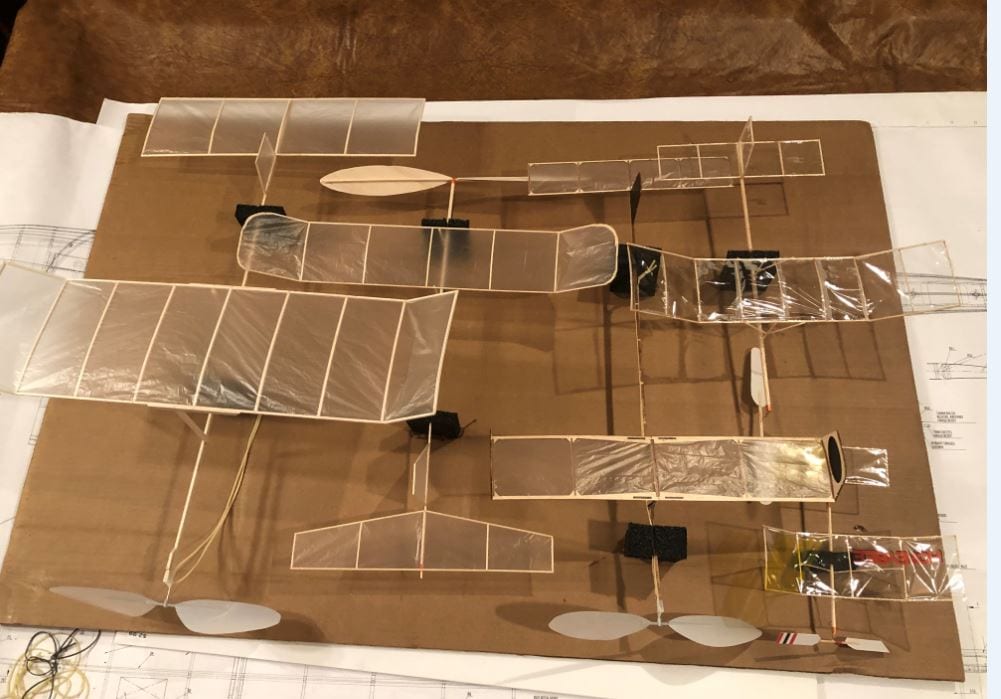
Next step is to fabricate a simple cardboard box type setup to carry these flyers in. Below is a picture of the first indoor free flight test fleet. As soon as the carrying case is complete and a suitable indoor location is secured, it is time to fly them!!
(Dec 16th, 2018)
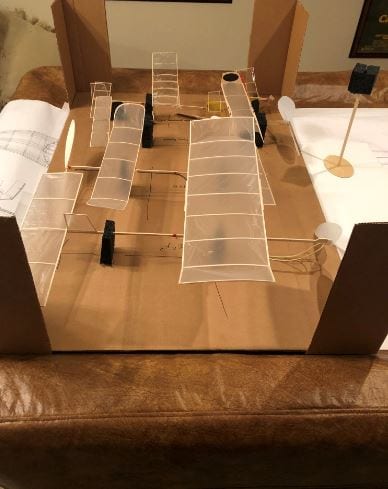
Transporting Indoor Free Flight Models
If it was just as easy as a throwing the airplanes in the truck and heading to the field, for this “several grams” near lighter than air flyers! Oh NO, any breeze, bump, etc and these indoor free flight models will get damaged! So, a carrying case of sorts is required and it needs to be light weight itself. Here are a couple of pictures showing the case being built. Nothing fancy! Hot Glue, Foam, and lots of cardboard (which ran out!).
(Dec 21st, 2018)
Flight testing has begun! A very valuable lesson for these indoor free flight model flights was learned. It is, preparation for the flight site is extremely important. The ergonomics of how you will wind the rubber motor, how you will move it to the model easily, etc etc are extremely important. Why? Simple really. Once the motor is wound, it is full of potential energy ready to ‘explode’! Moving the rubber motor to the very delicate model is more like a slow dance than a fast one and one little hiccup and you have a problem. Actually damaged two of the three models before their first flight, and did not have the repair equipment on site to fix. Here is the Camp Robber after a failed motor install.
The good news, the A-Class model took to the indoor sky and stayed a float for approximately 1 minute. It was stalling out and some tweaking will be needed on the CG adjustment. Here is the models first flight.
Focus on building an ergonomic setup is next. Requirements will be:
- Carry capability of models that have wing removed for travel
- Stands to hold models as they are prepped for flight
- Winding capability for single person, with torque meter inline
- Holder for winder which allows it to lock in place to keep motor from unwinding.
- Portable setup
I2-EZB Competition build.
A separate post will now track the development and fine tuning of the I2-EZB Indoor Free Flight model. This post will continue to document the journey!
Jan 29th, 2019
Feeling confident in both building and flying skills now! Time to move on to the original goal when this post started. An F1D Indoor Free Flight Model design and build. Gathering the required materials now, so watch for a separate post.
It is a bit overwhelming as research into forming the tail boom and motor stick, variable pitch prop construction techniques and on and on! Good thing this is just a hobby and not a career!
Must Reading for Rubber Powered Projects!