
Designing a RC Glider Kit and Balsa Airplane Kit
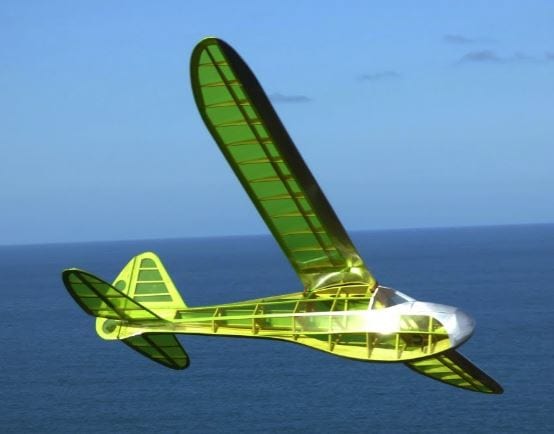
Lots of activity around the Discus Launch Glider these days, including our hand cut, hand built custom one-off design which is documented here. We received many inquiries asking if there would be a RC Glider Kit or Balsa Airplane Kit made available after a successful flight? Because of the inquiries, we decided to make such a kit! These would require laser cut parts and we need to learn how to do that! Since our own DLG Design will probably undergo design tweaks in the process, a decision to use a released design was made. We picked the Apogee Sport DLG for this effort! Here is a beautiful image of one!

Getting Started. the good news is, we know how to design and build! So, once we get some parts cut, we’ll be quickly down the path for this rc glider kit. At a high level, the process we expect to follow is:
- Learn how to print large drawings
- Determine the best method to panelize the different parts to be cut
- Find a local partner to cut the panels
- build up a prototype or two and dial in the process using Plan Do Study Act Continuous Improvement Techniques
- Create a Short-Kit Offering and make available
Through-out the above steps, we’ll be flying and having a lot of fun. Looking forward to seeing how this RC Balsa Glider/Airplane Kit turns out. Especially the Laser-Cutting!
New to this project: Here are just few new websites, tools, resources we came across while working this project.
- Stick Fast Thin, Medium, Thick and Activator starter kit. We were really after just the large spray activator, but of course, we got the entire starter kit! CA is CA, but its a good deal.
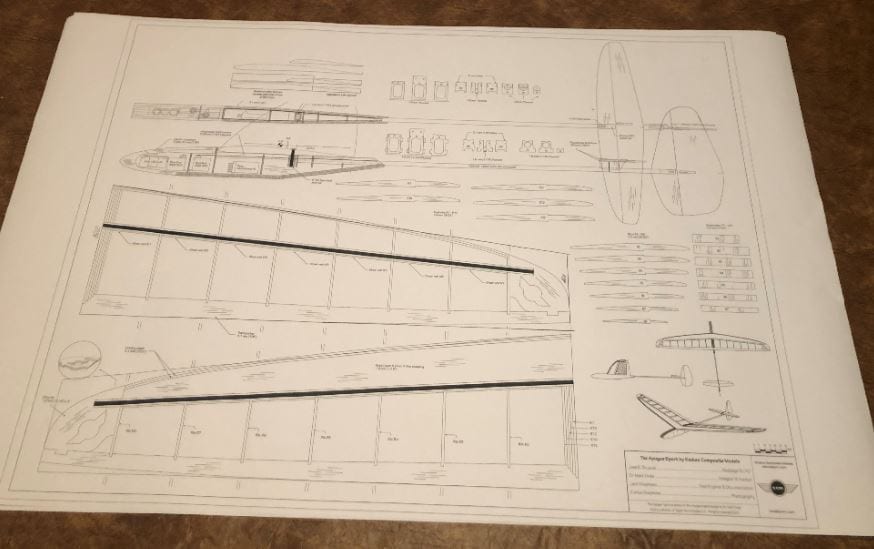
Learn How To Print Large Drawings
This first task is complete and it was much easier than expected. We tried two different print shops and each one delivered! At the end of the project, details on how to print will be provided! Here is a stack of 5 prints for this rc glider kit.
Paneling and Cutting Parts
Have identified a potential local partner to help cut the parts via Laser. Though we’ve removed many parts from pre-cut panels for assembly, we don’t know much about the cutting process! Final appointment to meet up is still tentative, but should firm up within a week! Should be interesting…
The local laser cutting supplier has given me the requirements, which is the good news. The Wing Rib Template for this balsa airplane kit is ready, based on those requirements. This is the good news. The bad news is, they are very busy and there may be a delay. So, there is a good chance the first prototype will be hand cut, after printing this template to card stock. We shall see!
Here is the template:
Pass Number 1
Not Good! Not Good at all! Now the question is, should these parts be hand cut for build number 1 or attempt the cuts again somewhere-else. Have reached out to other cutters, who have experience in cutting a balsa airplane kit. There is hope this rc glider kit will come to life in kit form, and not just a one-off hand cut build.
Pass Number 2
There is good news. Arrangements have been made to have an experienced balsa airplane kit cutter provide this short-kit. Looking forward to the arrival of the first one so progress can continue.
The Short-Kit
The local supplier, as mentioned above, did not work out, but no reason to give up! The good news is, a highly qualified cutter has been found and the First Article Short-Kit has arrived. First Impression….FANTASTIC QUALITY!
Here is a picture of the kit spread-out. The precision of these small cuts is very impressive and it is time to spread the plans out for this rc glider kit and get to building!
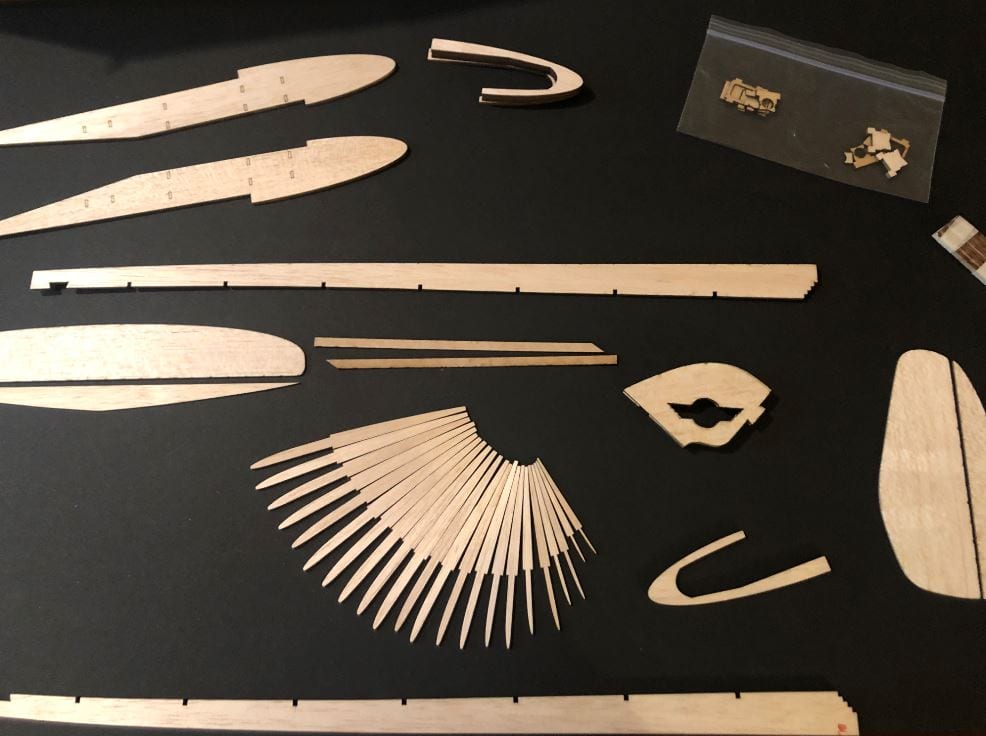
A quick check on additional materials needed and then off we go!
Building The Wing
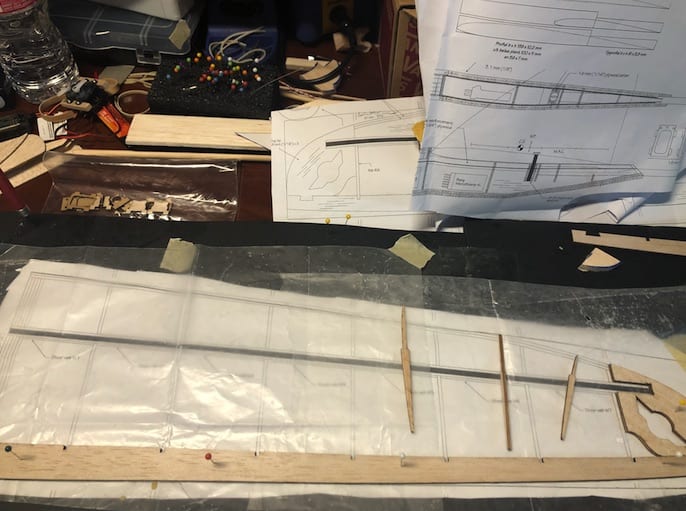
The short kit has been reviewed and again, it is of very high quality! After sorting everything for the wing and prepping the building board, it is time to build this rc glider kit. From initial review it shows only 1/16″ sheet will be required to finish the wing (excluding the carbon fiber support). Note: understanding the both the carbon fiber tube and wing support will occur further down the road so that only one order of material has to take place.
Here is the board and the beginning of the right wing panel. So is this the beginning of a cool little airplane? We think so! Stay tuned for more!
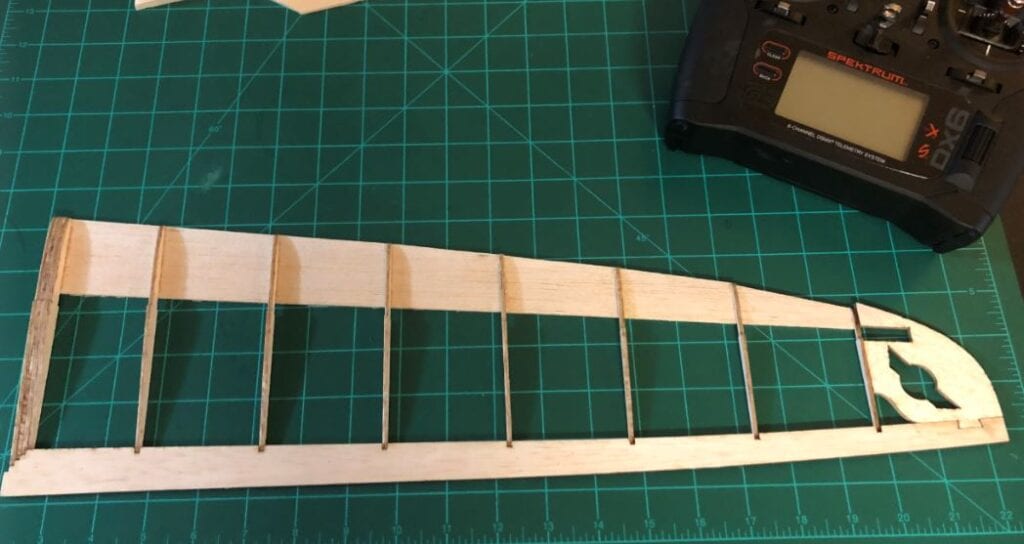
The drawing call for 1/16th balsa sheeting from the middle spar to the leading edge on both the bottom and top of the wing. Also called out is carbon fiber tape to be placed over the 1/16th middle spar. The first version of ours will be build with the following modification:
- Bottom sheeting will be 3/32″ instead of /16th” to increase strength without adding significant weight
- The middle spar will be a 1/16″ x 1/4″ basswood spar, without the carbon fiber tape.
The hope is these two changes will allow the same strength without the need for using the carbon fiber tape. Here is a photo of the right wing with the 3/32″ sheet on the bottom for reference.
After sheeting the bottom of the rc glider kit, the top portion is sheeted with 1/16″ balsa. Once sheeting is complete, a strip of 3/32″ balsa is glued to the leading edge and sanded to final shape of the leading edge. (pictures coming)
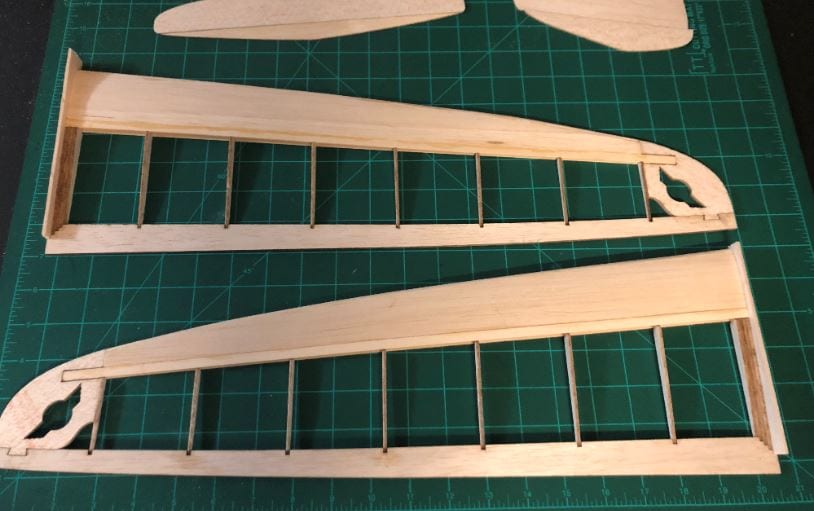
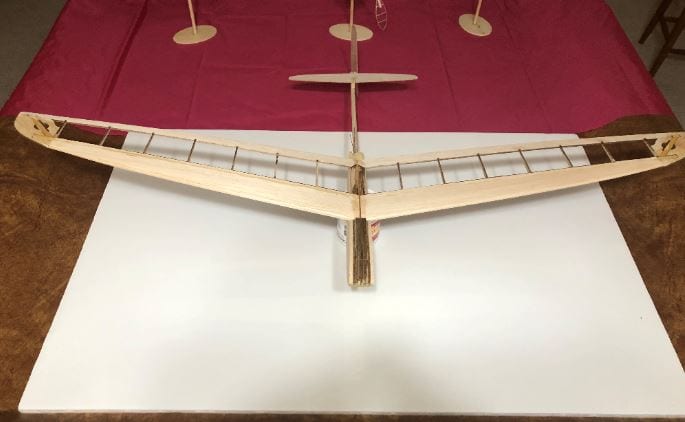
Here are the two wings halves with the basswood spars and sheeting. The inside rib is also shown as stock 1/16″ sheet, which will be trimmed to shape. Only thing remaining on these wing halves is the spar webbing and they can be final sanded/shaped. Looking good. Note: a bit concerned on the strength of the wing tip and am considering adding support.
Because feedback is so important, keep following and feel free to reach out and let us know your thoughts!

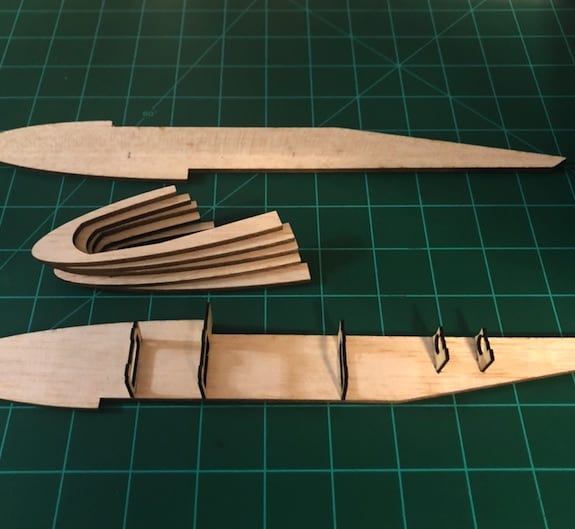
Build the RC Glider Kit Nose Assembly & Fuselage
Kicking off this part of the build is straight forward. A simple cut and fit of the nose side slots for the inside formers, then a dry run placement before gluing. We are showing here the right side of the nose assembly, with inside formers placed and glued.
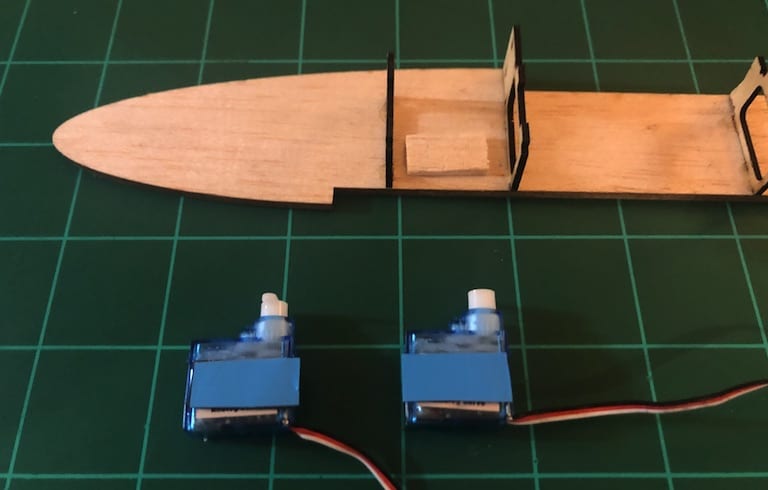
Installing the Servos and Receiver in this RC Glider Kit
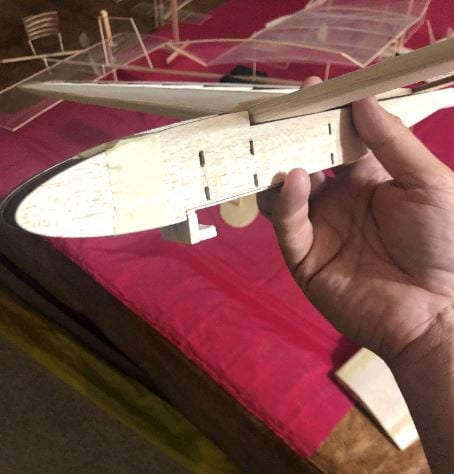
The servos for this small RC Glider Kit require attention when placing them. Very little room for error exists as these are a tight fit. The servos are 3.7g micro analog servos purchased at Amazon. They are mounted with Servo tape and as you can see from these photos, a 1/16th balsa spacer is glued in place to allow enough space to keep the control horn from touching the side wall. Also shown is the .025″ piano wire used for the pushrod. If you are building this, pay close attention to the spacing and alignment to make sure the control horns move friendly. Lastly, in these photos, you will see our favorite Spectrum receiver and we use it a lot! It is a tight fit, but it does fit.
Servos with Tape and Balsa Spacer 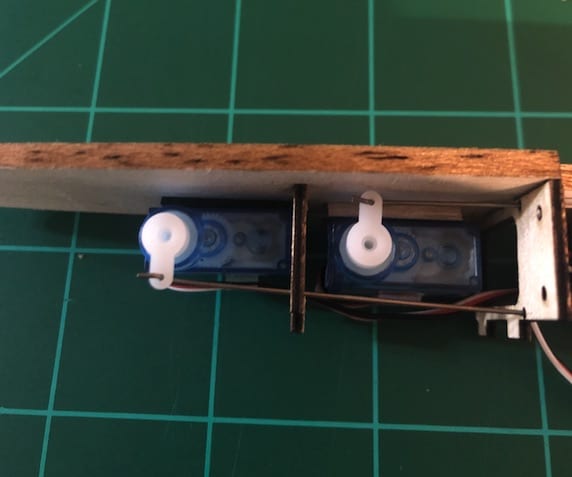
Top View of Servos Installed 
Open View of Servos and Receiver
Deviating from the Plans: From Apogee to Chubby Apogee
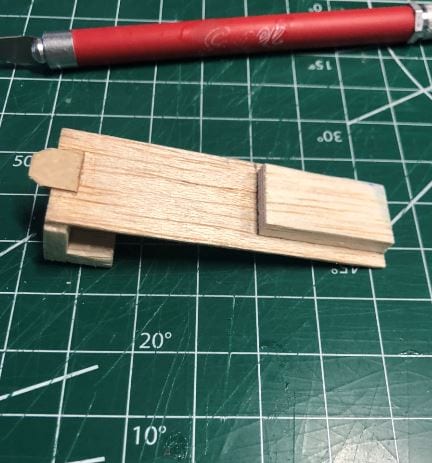
A decision was made early to use standard size electronics, avoiding the micro-size components which can only be used in other small flyers. The AR410 receiver is a common one we use in many of our flyers and for flyers without an ESC and Motor, we like to use a Single Cell 900mAH battery like shown below.
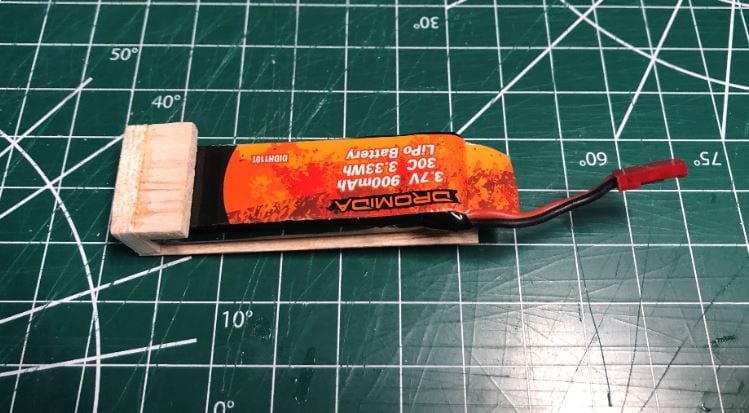
In the above picture, a holder is fabricated from balsa and will be cradled under the nose assembly.
In this picture, you can see where this will mount (battery not shown in the cradle).
Here is the final cradle with tabs to create a snug fit but will allow it to be removed. (note, there is a cover on the bottom side not shown here, that creates the final cover/flap that gets secured.
Here are a few more pictures of the custom fabrication to include the larger battery (ie, the Chubby Apogee modification).

More Strength on the Wing!
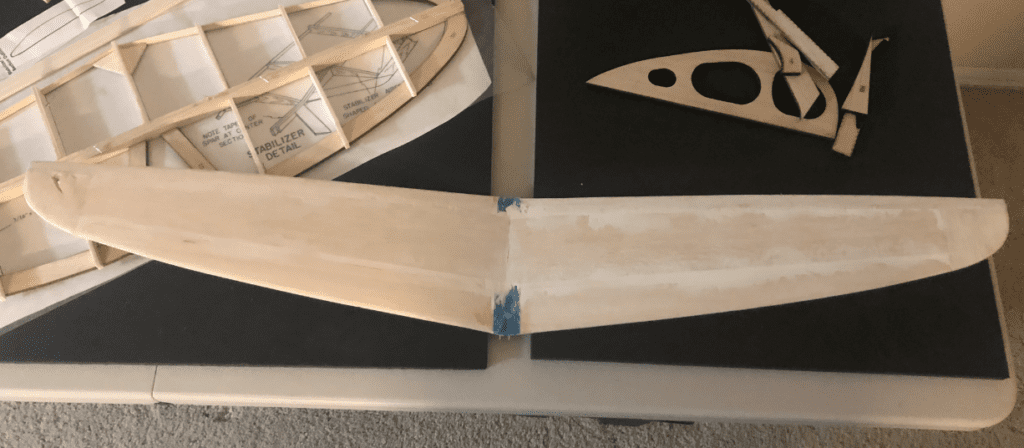
During initial sanding, I became concerned about the strength of the wing and whether or not it could handle the load during launch. To be safe, decided to cover the opening, top side only, with 1/32″ sheet. Yes, there is a weight increase, but this first built, it is better to be safe than sorry.
Here is final wing, almost ready to cover, just need to add launch peg and final center section.
Covered, Painted and Ready for Final Assembly & Test
Covering Used for this build was Hangar 9 Ultrakote. Very easy to work with!

Next Up….Design and Cut Decals and Final Assembly!
Miscellaneous:
Looking for the Original Prints? Here they are:
Remember to #GETOUTANDFLYSOMETHING!