RC Aircraft Battery Switch Design For a Discus Launch Glider
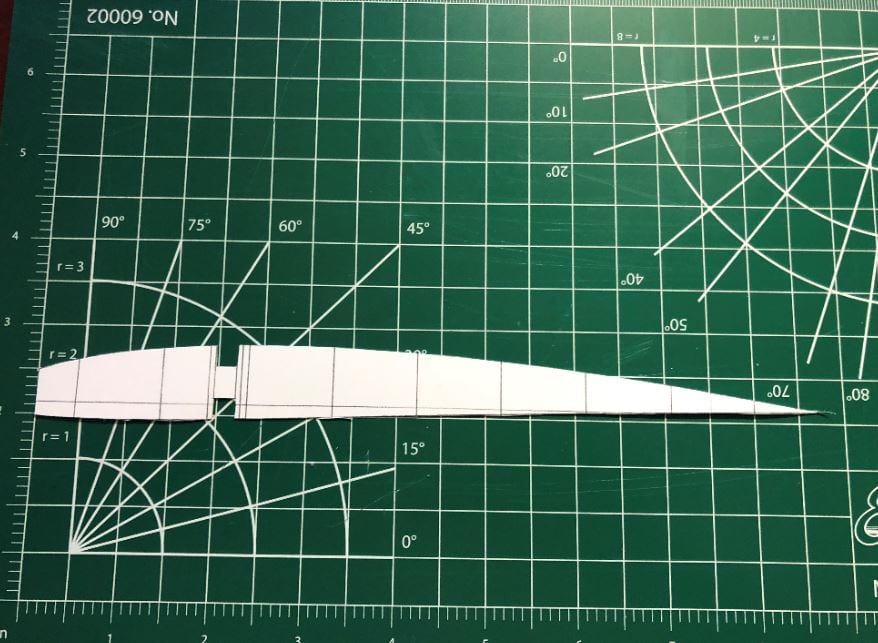
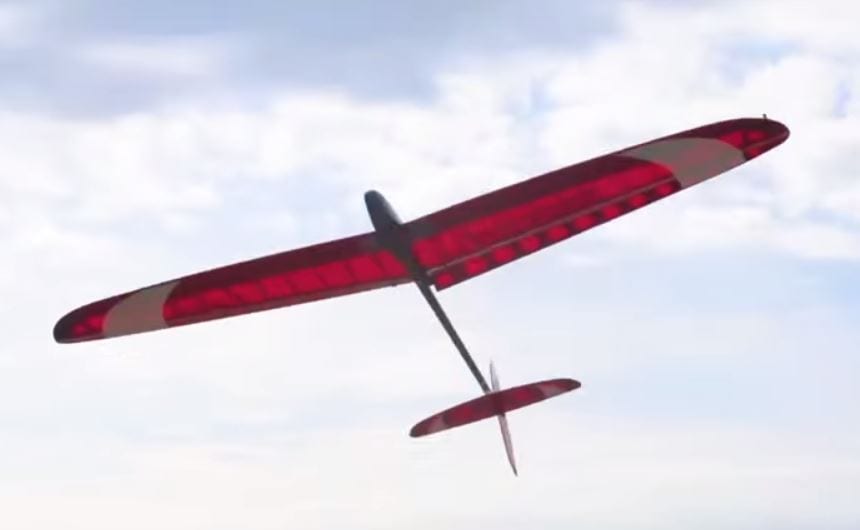
The purpose of these instructions are to document the build of a 3-way RC Aircraft battery to receiver switch. This custom switch will go on a small, DLG referenced in another post but can go on any typical RC Aircraft configuration. This particular need is to allow the nose cone of a Discus Launch Glider to be taped shut permanently and still be able to turn the receiver on and off, along with charge the battery within. A standard switch assembly is to large, so a custom one-off solution is being designed here.
Getting Started
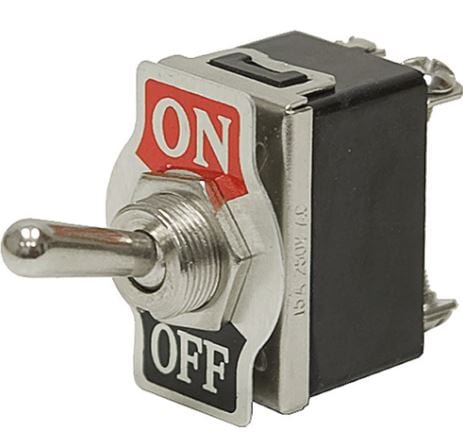
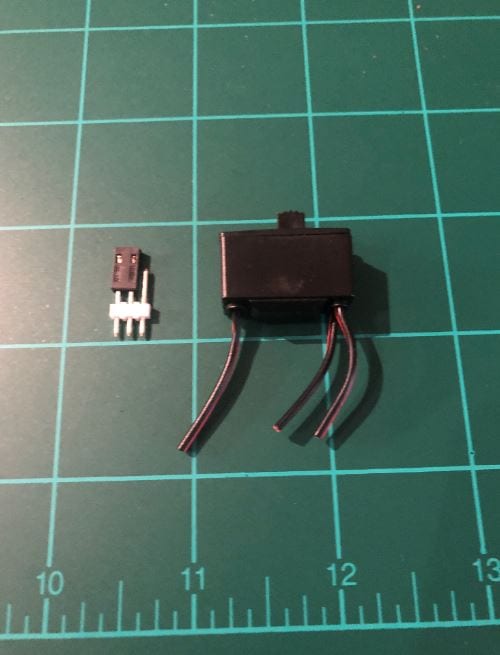
So, initially, an off the shelf 3-way switch from Horizon Hobby was purchased thinking it would fit nicely. Unfortunately, it was to large. Here is the picture of the switch, connected to the discus launch glider receiver and battery. From the picture, it should be obvious this switch is to large for the nose cone of this particular rc aircraft. So, no worries, this modification will solve the problem.
Even though the switch itself is to large, the 3 wire harnesses can be used. We will cut them off, solder them to a .1″ spacing 3-pin header, and solve the problem! Here are the next steps, followed by step-by-step photos:
Step by Step
- Cut each of the servo wire harness sets off of the switch, approximately 1″ from the switch. (save the switch, you might be able to use it on another project)
- Separate and strip, using standard wire strippers, 1/4″ from each end, on all the wire harness sets.
- Using a solder iron and solder, tin each wire end where the exposed wire is. Here is a great video to show the technique if you are unfamiliar.
- Cut heat shrink sleeving prior to soldering the wires to the header.
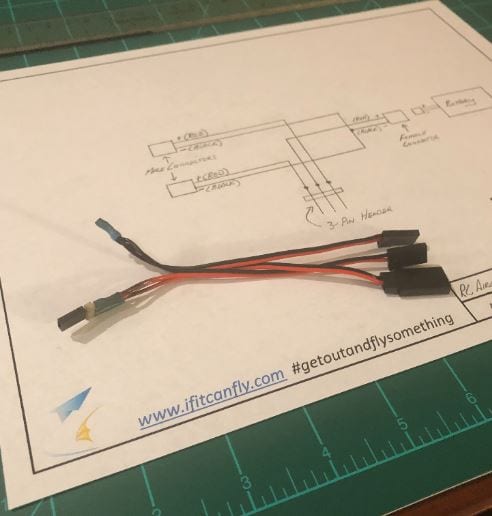
- Next, solder each wire harness set to the 3-Pin header, per the attached Battery Switch Schematic Drawing. (download right below)
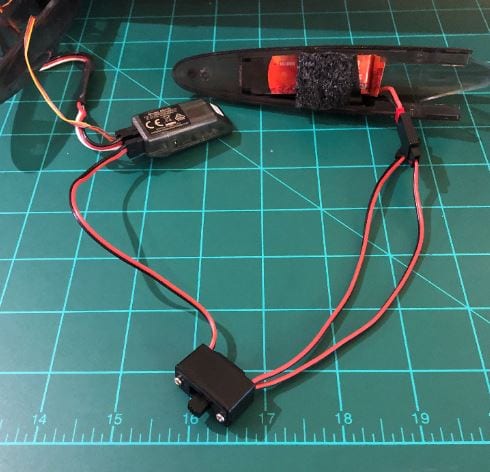
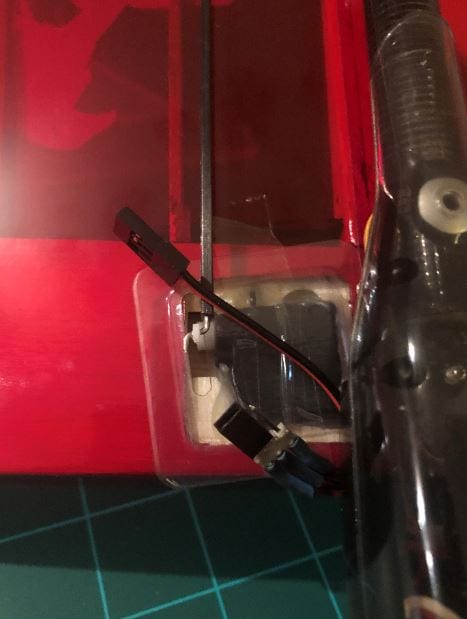
- Install RC Aircraft Battery Switch Harness into the Discus Launch Glider, with one of the male connectors in the receiver battery location and the other hanging out of the, along with the jumper switch. Install the female connector onto the battery.
- Re-assemble the nose cone front end. Because there is little room, pay close attention when tucking all wires inside, except the jumper switch and the charge port (male connector).
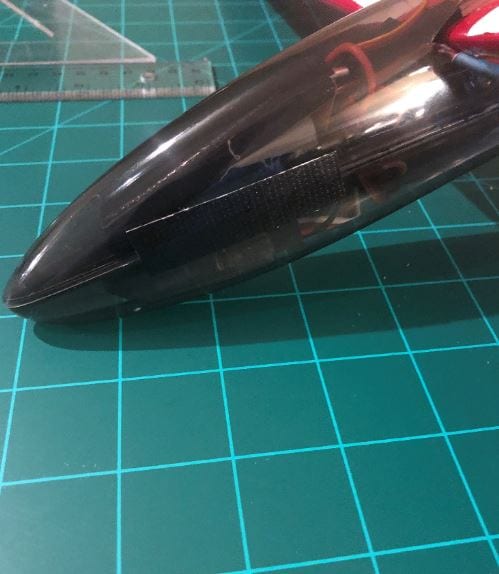
- After verifying everything still works (battery can charge with jumper in one position and in the other, the receiver turns on), button up and secure the two halves on the nose-cone with black tape of your choice.


OPEN Field Flying!
No issues in flight! Because of this extra effort up front, flights are much more enjoyable now. The jumper switch remains securely in its position and with the charge port outside of the secured nose cone canopy, charging is extremely simple! So, we recommend you make the modification, it will be worth your time!
Material and Parts Used:
Here is the radio, receiver and switch harness used is the above example, all purchased at Amazon. The receiver and switch harness were purchased specifically for the DLG shown which came with pre-installed servos.


Here is the Molex 3-Pin connector and 2-Pin shunt (jumper) used, purchased from Mouser.
Any questions, feel free to reach out via Contact Us and remember to #getoutandflysomething!